Helsinki Tram Time Display
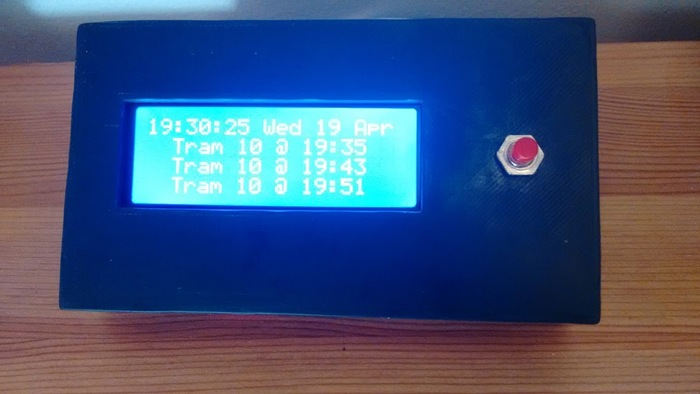
The goal of this project was to avoid waiting at the tram-stop in sub-zero temperatures, which would be achieved by having a constantly-updating display showing the next departure time from our local tram-stop.
If there is a tram due in a couple of minutes we could leave the house in safety, if there was a wait of 10+ minutes we'd stay indoors.
Hardware
The hardware for this project is simple:
- 1 x WeMos Mini D1
- Approximately cost €2.50.
- 1 x Push-Button
- Approximate cost €0.05.
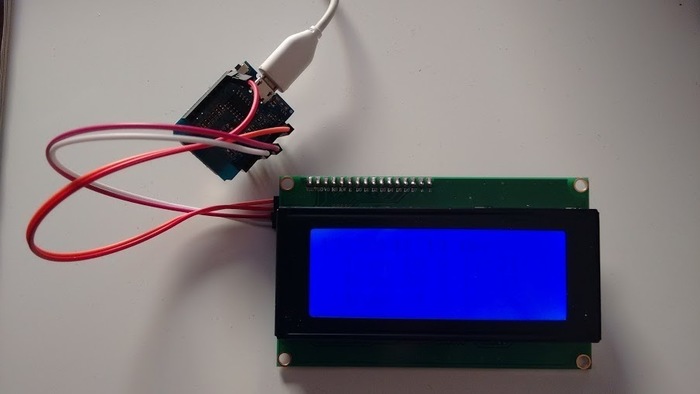
- 1 x I2C LCD Display
- Approximate cost €1.50.
- We've previously documented using an I2C LCD with an Arduino.
- In my project the display was initially 2x16, but the code allows for different dimensions.
- I soon upgraded it to a 4x20 display instead, as pictured below.
Wiring merely consists of connecting the display to the Mini D1 board, which is in turn powered by a simple USB-PSU, then adding in the push-button as an optional extra. The display-wiring is as follows:
- Vcc -> Vcc (3.3v)
- Ground -> Ground
- SCL -> WeMos D1 D1
- SDA -> WeMos D1 D2
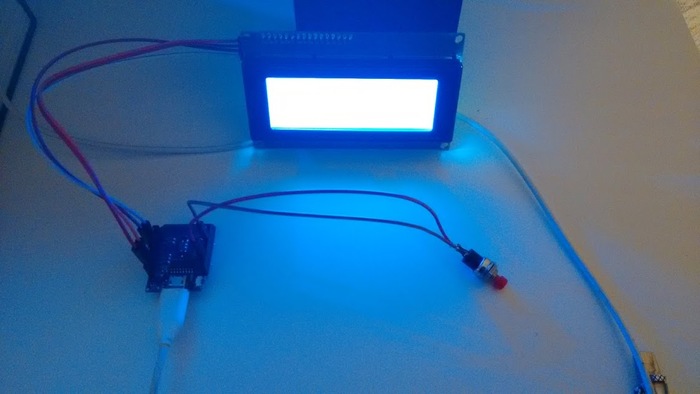
The push-button is connected between D0 & D8, and is entirely optional
Images
The initial setup looked like this:
Then I added the optional button between D0 & D8:
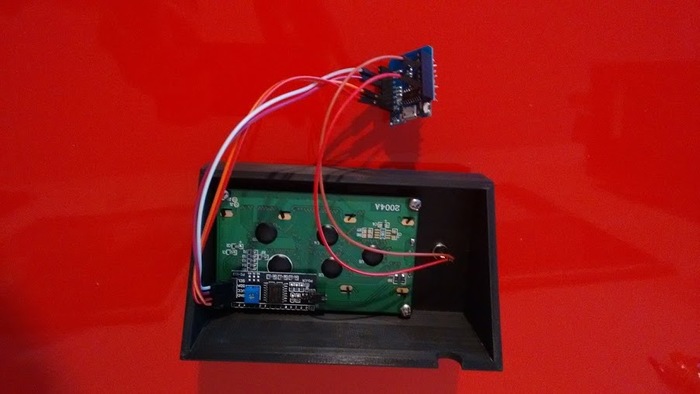
Finally the project was fitted into the box I had 3d-printed:
Operation
If you've previously configured WiFi details the device will connect automatically to your local network and begin working:
- Updating the display once a second.
- Resyncing the time, via NTP, every five minutes to avoid drift.
- Serving a simple GUI via HTTP
- This mirrors the output shown on the device screen, as well as allowing changes to be made, for example:
- Controlling the backlight.
- Changing the tram-stop being monitored.
- Changing the TimeZone offset (i.e. This project is for Helsinki, so we're at
GMT + 2orGMT +3.)The optional button allows some immediate actions to be carried out, without reaching for your mobile device :
- A short-press
- Toggles the state of the backlight.
- A long-press
- Triggers an immediate resync of the date & time, as well as the tram-data.
If you've never configured the device before it will begin to operate as a WiFi access-point - you can use your mobile phone, or other WiFi-connected device, to connect to this access-point and setup the local WiFi network it should join.
Thanks to the web-based GUI the project does not need to be recompiled to change the networking details, or any of the other configuration settings!
Software
The software for this project is divided into a few distinct parts:
- Handling connections to the local WiFi network.
- You need an IP so you can connect to the internet to fetch the timing details.
- Fetching the current date & time, via NTP.
- Drawing that date & time.
- Fetching the tram-time for the local tram-stop.
- Drawing that data.
- Allowing over the air updates, directly from the arduino IDE.
- Handling input from the optional button.
For dealing with the date & time, including retrieving the current time via NTP, I used the standard time library, which has excellent support for such things. The web GUI allows changing the time-zone, which is necessary if you're outside GMT.
Retrieving the departure-times for a given tram-stop is pretty straight-forward, but to isolate the device from changes I setup an API-proxy to handle retrieving departures. Due to changes that is no longer available, but the client code will make it obvious how it worked.
Display modes
By default the first line of the display will show the current time & date. However other display-modes are available, and can be selected by pointing your browser at the IP address of the device:
- Show the time and date.
- Show the time and current temperature.
- Unfortunately this is hardcoded for Helsinki at the moment.
- Perhaps forgiveable given the nature of the project.
- Show the time, and alternate between date/temperature display every 10 seconds.
- Show a fixed message
- For example "Happy Birthday!".
The Code
Several libraries are used, and these are bundled together in a git repository, you can access all the source by cloning the repo involved, and then looking at the project:
The code has become a little more complex over time, especially since the addition of the web-based user-interface, but if you have any questions feel free to ask away.